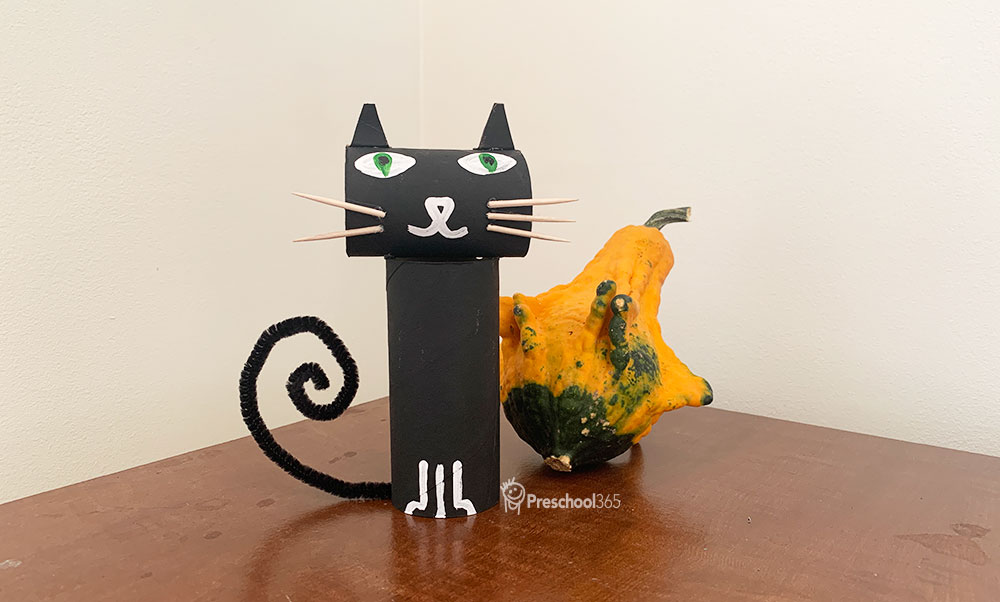
How to make a spooky cat from a toilet paper roll
It’s the fall and Halloween season, and the spooky crafts are here! We always remind parents that this is not just a craft, but a memory-making activity. It is also a learning opportunity. Talk about cats, what sounds do cats make? What are the beginning, middle, and ending sounds for the word (cat)? So whether you have a preschool class, a kids camp group, a Sunday school class, or you want to have fun with your little heart this Halloween, this bat art craft project is the deal. Let’s get started.
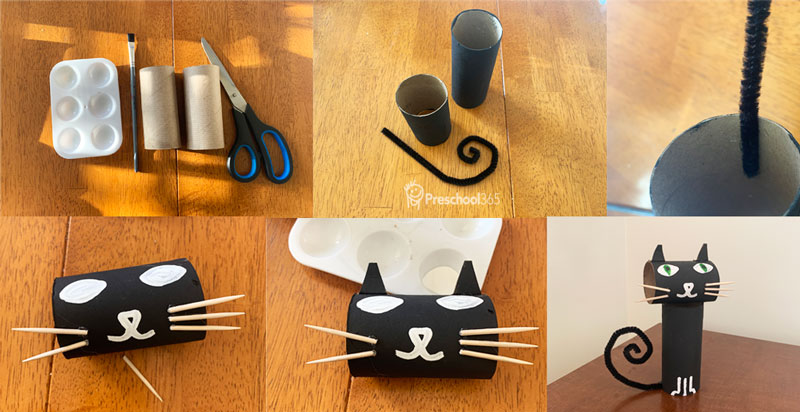
What we need:
- A chenille stem.
- Two toilet paper rolls.
- Three toothpicks to be cut into two each for the whiskers. You can also just use a piece of the paper strip.
- Your regular cutting, gluing, and painting tools.
- Finally, you will need your imagination.
STEPS:
1. Cut off 1/3 of one toilet paper roll. Paint the rolls black.
2. Cut each toothpick into two. Stick them with a hot glue gun onto the smaller roll as whiskers.
3. paint the eyes and mouth with your own colors.
4. Attach the chenille stem to the inside of the bigger roll and fold the stem to make the tail of the cat.
5. Draw the legs.
6. Cut two small triangles from the piece of paper roll and use them as the ears of the cat. Glue them to the head.
7. Now, carefully attach and glue the head to the body of the cat. Done.
That is it. Your preparation for Halloween is one step closer to completion. Bring on the candies!