How to make a spooky halloween bat from a toilet paper card
It’s the fall season, and the pumpkins are out. Kids are getting Halloween decorations out. The preparations will never be complete without bats! So whether you have a preschool class, a kids camp group, Sunday school class, or you want to have fun with your little heart this Halloween, this bat art craft project is the deal. Let’s get started.
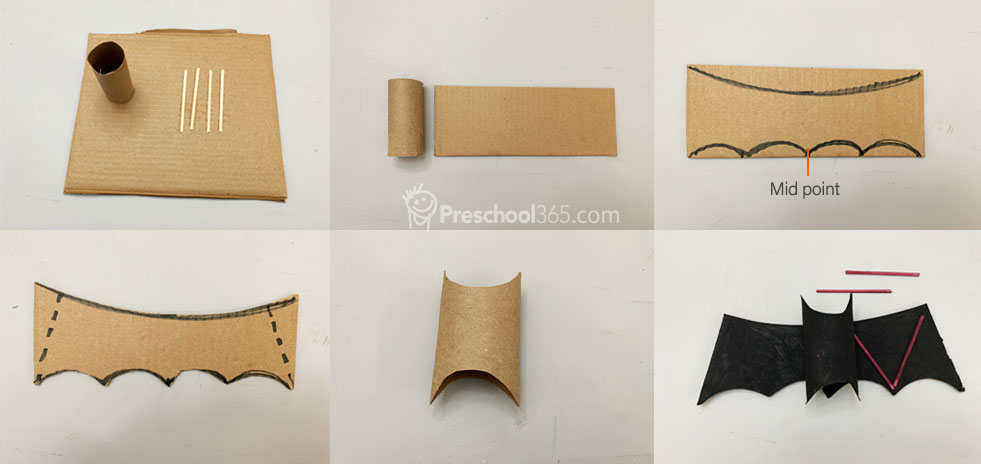
- A piece of rectangular cardboard (4×10 inches).
- A toilet paper roll.
- Four toothpicks or barbeque skewer sticks cut into 4inch long pieces.
- Your regular cutting, gluing, and painting tools.
- Some googly eyes.
Steps
- Make a long curve at the top of the rectangular card. Cut it out
- Make four even curves at the bottom of the card. The middle point will provide support for the bat, so be sure you have a midpoint. (see image). Cut the curves out. You should be seeing the wings of the bat now.
- Trim off the sides of the wing to give it a beautiful angle.
- Flatten the toilet paper roll and cut out curves at the top and bottom. The top will be the ears, and the bottom will be the legs.
- Paint the toilet paper roll and the wings black. Paint the toothpicks brown or a lighter red to give a beautiful contrast in the wings.
Finishing
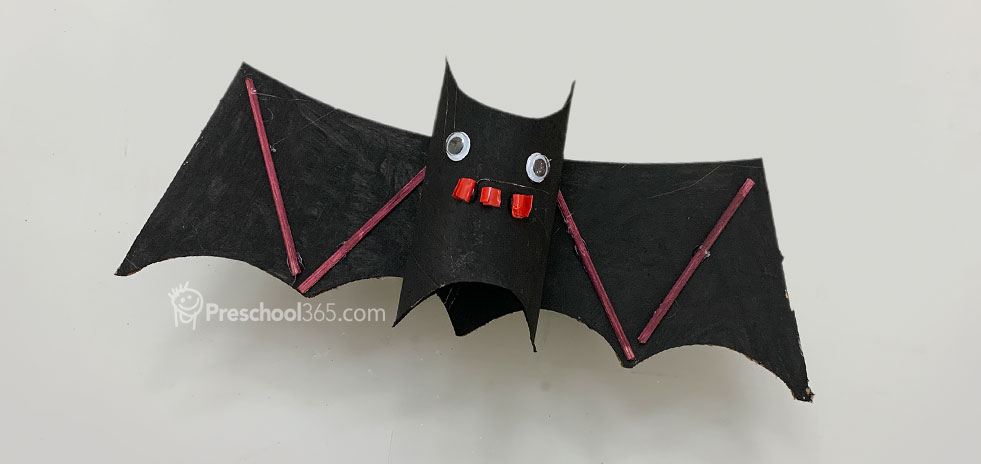
- Glue the toilet paper roll (body) to the wings. Before gluing, ensure that body and the wings are standing level so that the bat can stand on its own. No need if the bat decoration will be hanging from a support.
- Glue the toothpicks to the wings in any pattern you desire.
- Fix the eyes. If you want an extra spooky effect, cut out a red piece of paper for the mouth.
That is it. Your preparations for Halloween are complete. Bring on the candies!